Wear Part Replacement
- Home
- Wear Part Replacement
Wear Part Replacement
- Home
- Wear Part Replacement
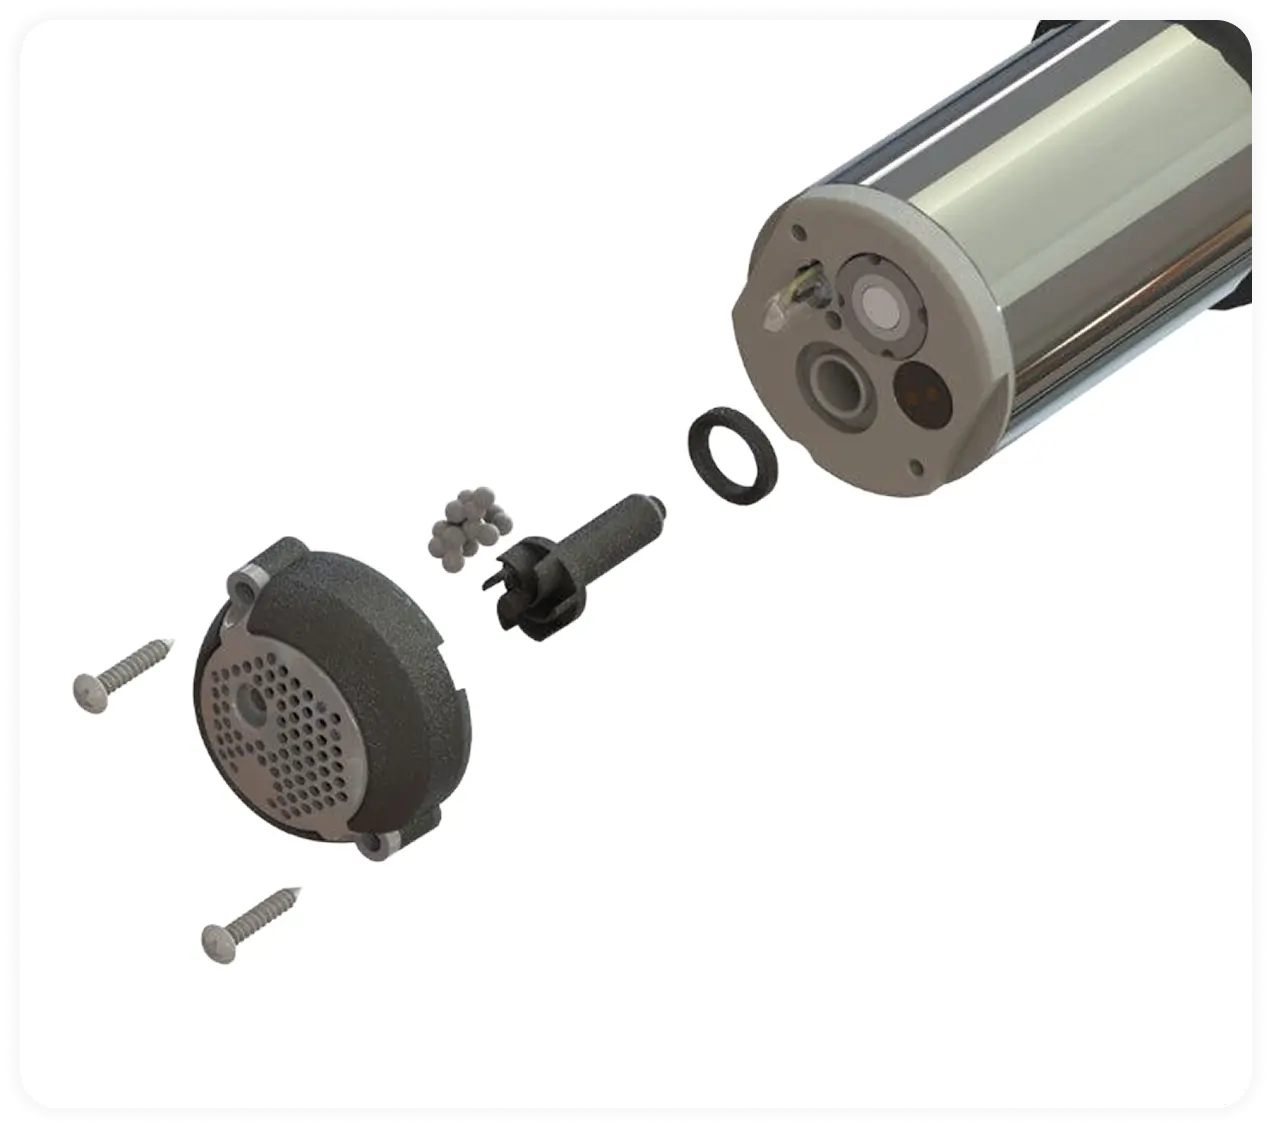
Required Tools
Cover Screws (x2)
Secures the sensor cover.
Sensor Cover (x1)
Protects internal components.
Cleaning Beads (x20)
Helps maintain self-cleaning efficiency.
Impeller (x1)
Rotates to maintain water flow.
Wear Ring (x1)
Prevents excessive wear, ensuring smooth operation.
Required Tools
Cover Screws (x2)
Secures the sensor cover.
Sensor Cover (x1)
Protects internal components.
Cleaning Beads (x20)
Helps maintain self-cleaning efficiency.
Impeller (x1)
Rotates to maintain water flow.
Wear Ring (x1)
Prevents excessive wear, ensuring smooth operation.
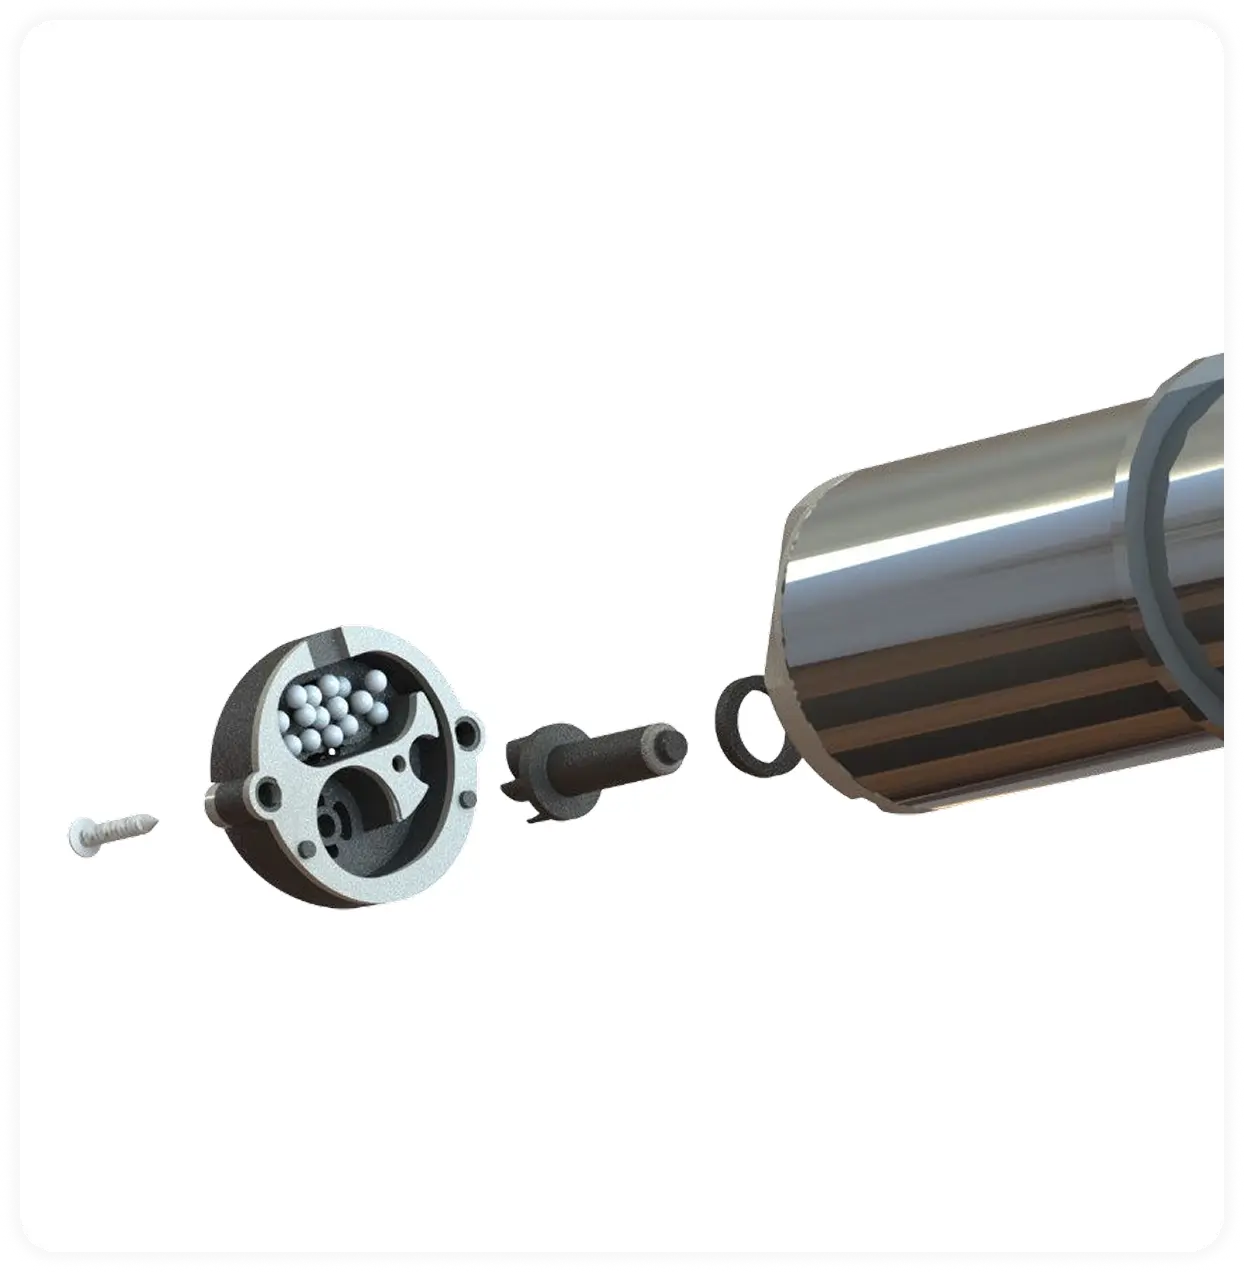
Removing Old Wear Parts
Remove Cover Screws
Use a Philips #1 screwdriver to remove 2x screws from the sensor cover.
Maintain Pressure & Rotate Sensor Vertically
Keep pressure on the cover to prevent components from shifting.
Remove the Sensor Cover & Impeller
Slowly take off the sensor cover, then remove the magnetically coupled impeller.
Remove the Wear Ring
Carefully extract the wear ring from its groove.
Clean Sensor End
If fouling is present, clean using Isopropyl Alcohol and a lint-free cloth. (Avoid scratching the electrode surface.)
Installing New Wear Parts
Install New Wear Ring
Place the new wear ring into the groove.
Insert New Impeller
Place the new impeller into the impeller well.
Add Cleaning Beads (x15)
Place 15 cleaning beads inside the sensor end cover. (Ensure beads stay in the electrode compartment.)
Align Components Properly
Align the temperature sensor and impeller with their respective holes in the sensor cover.
Lower Sensor into Sensor Cover
Gently twist the cover until the guide pins drop into place.
Secure the Cover Screws
Insert and tighten 2x cover screws until the sensor cover is fully secured. (Do not overtighten to prevent motor binding.)
Testing the Sensor After Wear Part Replacement
Power On the Sensor
Ensure the impeller spins freely.
Check for Impeller Resistance
If the impeller does not spin, loosen the cover screws ¼ turn at a time until rotation starts.
Perform a Water Test
Submerge the sensor in a bucket of water to confirm water flow from the ejection port.